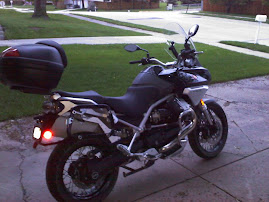
I installed a Pelican 1450 top box shortly after taking the first overnight trip on my bike. I really needed some lockable, waterproof storage for my valuables. Well, I found out after some recent riding that 3 of the 4 bolts securing it to my luggage rack were sheered off. NOT GOOD considering I carry my DSLR Nikon camera in it. I am guessing it happened while beating the bike around in the woods carrying tools in it.
THE REPAIR
First, I used some of the "pluck and pick" foam that came with the box to design a foam organizer to keep valuables from flopping around in the case. The next thing I did was upgrade the size of the box. I really like riding the bike on day trips without the saddle bags - the bike feels better in the twisties. Also, I commute to work on the bike and my laptop bag will not fit in the existing box. At the same time, I want to be able to switch back and forth from smaller to bigger box as needed. So, I decided to run the bolts up through the bottom of the luggage rack as posts and secure them with wingnuts inside the box. That way nobody can remove the locked box from the bike, yet I can still take it off in a minute if I want to.
PELICAN 1550
I went with the Pelican 1550 after looking at several sizes. I also looked at GIVI top boxes - which are extremely nice and also affordable. However, I really like the "utility" of the Pelican cases. The 1550 is 2 sizes bigger than the current box I have - it actually fits inside of the 1550. My foam organizer tray also fits nicely inside the box leaving room for a small cooler. This is going to be perfect for long day trips, commuting, or trips to the store. I do plan to continue to use the smaller box if I go on any rough roads.
THE REPAIR ISSUES - Stripped out threads
The first chore was to drill out the sheered off bolts in the frame where the luggage rack is secured. WHAT A PAIN - I think I broke about 15 drill bits and a couple of taps. Once this was complete, I had to carefully align the box and make a template for drilling the holes - turned out perfect. I am very happy with it.


1 comment:
Great write-up and pics. It looks great Rob!
Post a Comment